How to Prepare Files for Printing
Prepress Directions Using Our Free Templates
If you're using one of our stock die templates for your shelf wobbler, shelf strip or aisle violator, follow the directions below to get started. Once you've chosen your size and downloaded your shelf wobbler, shelf strip, or aisle violator template, just double-click the folder to unzip the file. The instructions for wobblers, shelf strips and violators are similar, but do have some differences. For example, shelf wobblers are most often single-sided and made from 10 mil white vinyl. They can be printed double-sided, but will require a custom quote. Double-sided wobblers will still be printed on .010" vinyl so they aren't too rigid; they need that wobble-ability (yeah, I know I just made up a word there).
Aisle violators, on the other hand, are always printed on both sides (4/4); and they are always printed on 15 mil mil vinyl for its opacity (so you don't see printing from the other side). Unlike shelf wobblers, violators need more rigidity since they don't wobble. The added strength from the thicker vinyl allows them to jut out from the shelf without being, well, floppy. Unlike wobbler templates, violator templates will come in pairs of 2 mirrored images. This is for both the front and back side of the violator. You can either use the same artwork on both sides or have completely different messages and graphics.
File Formats Accepted
We accept files in the following formats: Adobe® Illustrator®, Adobe® Photoshop®, and high-resolution PDF. Please leave layers intact! In other words, don't merge them or flatten them (we need to be able to get into them). You can either send us your font files or you can convert the fonts to outlines before you send us your artwork.
Directions for Using Shelf Wobbler Templates
1. Pick your product: Go to the shelf wobbler prices page and choose the product, size, and quantity for your project. (Note the price breaks for ordering larger quantities. You're welcome.)
2. Download your template: When you see the size you want, click the button below the dimensions to download the template to your computer. From there, double-click on the file to open it and get your template.
3. Open the template in your image editing program where your art files are stored. Drop the template on your artwork (on a separate layer) and position it, leaving at least 1/8" around all sides so your art can "bleed off" the edges (see diagram below for example).
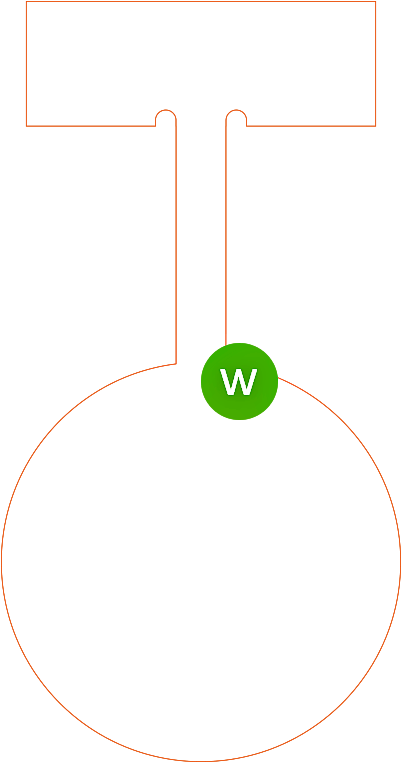
Shelf Wobbler Template
Template on Artwork

Die Cut Shelf Wobbler

4. Unless your wobbler will be double-sided, there's no need to spend time on artwork for the tab. Once installed in the channel of a shelf edge, you actually see the back of the wobbler's tab and about halfway up the neck. If you want this artwork to show, just let us know; we can give you a quote on double-sided printing.
5. Convert all fonts and graphic text to outlines using your art editing program. If you'd rather skip this step, no biggie. Just make sure to copy each font used into a folder marked "fonts" and either include this folder when you upload your artwork, or attach it to an email and send it to us.
6. Don't forget! We need the layers of your artwork file. Before you save and upload it, make sure you haven't merged, flattened or compressed the file. If submitting your files with layers makes the size greater than 20mb, you won't be able to attach it to an email, but you can easily upload it from the button at the bottom of this page.
7. Files can be saved as PSD (Photoshop®), AI (Illustrator®) or high-res PDF. These files can then be uploaded to our FTP server (see order instructions below).
Directions for Using Aisle Violator Templates
1. Preparing your files for aisle violators is exactly the same as shelf wobblers. Well, almost. The difference is that violators are always double-sided.
2. When you download your template from the aisle violator prices page, it will have two sides; one for the front and one for the back. That means you'll need to apply artwork to both sides before you upload it.
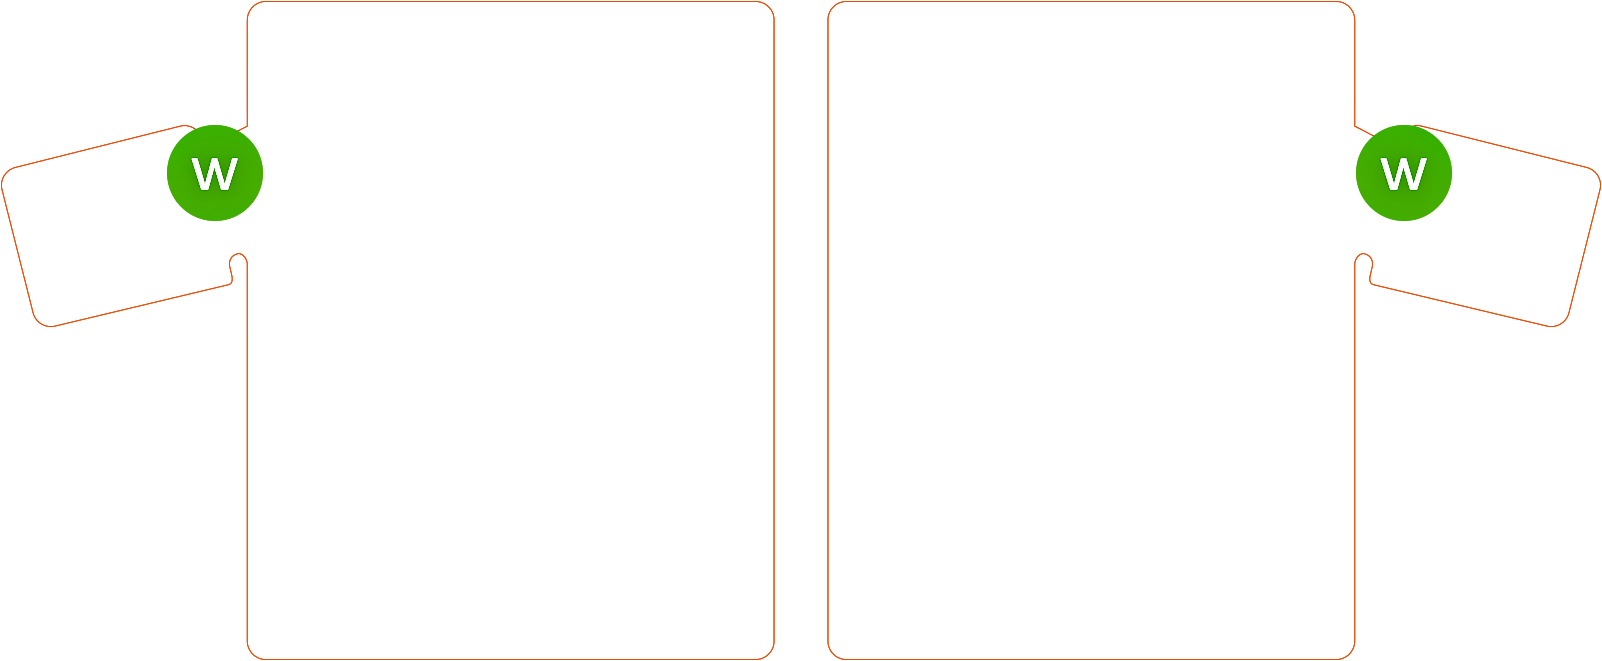
Example of Aisle Violator Template
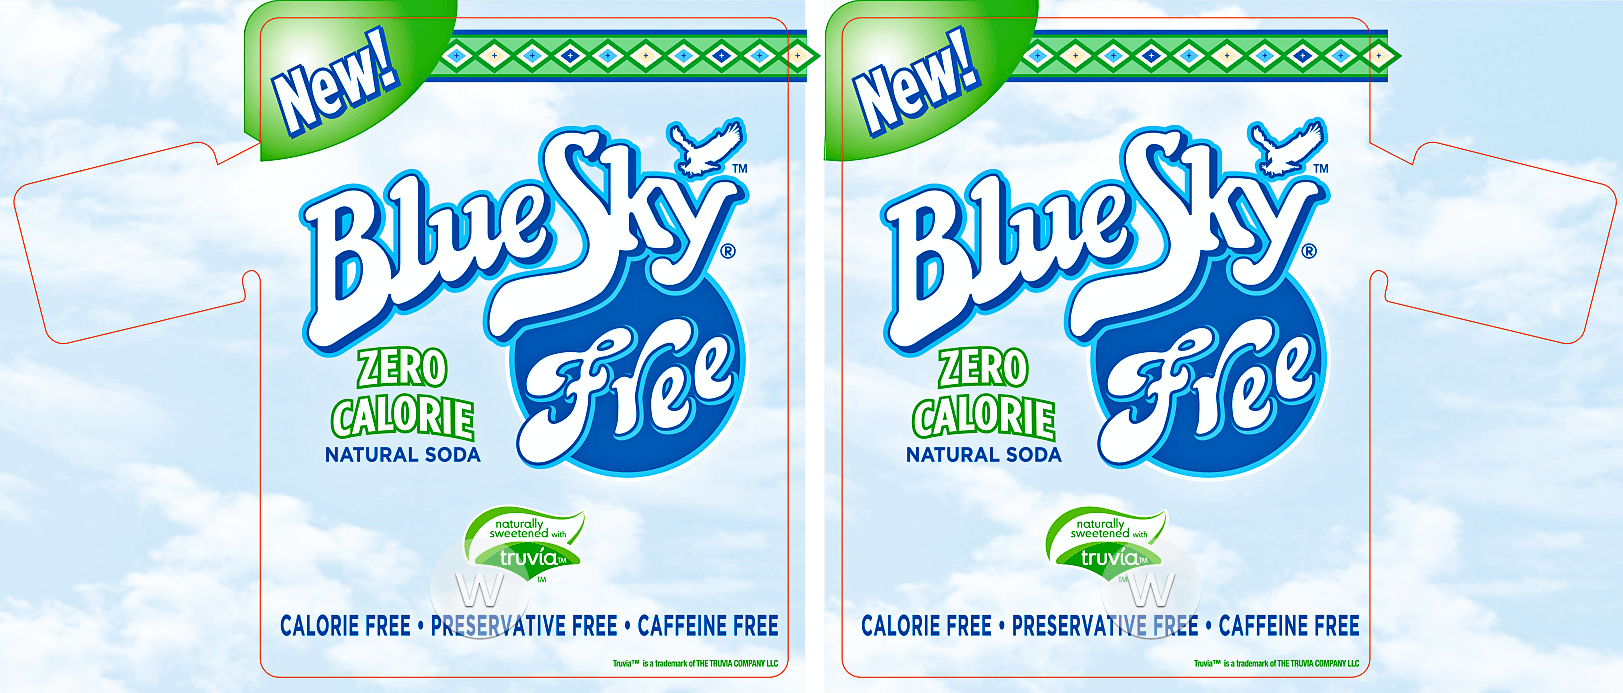
Example of Aisle Violator with Template on Artwork Showing Bleed Allowance
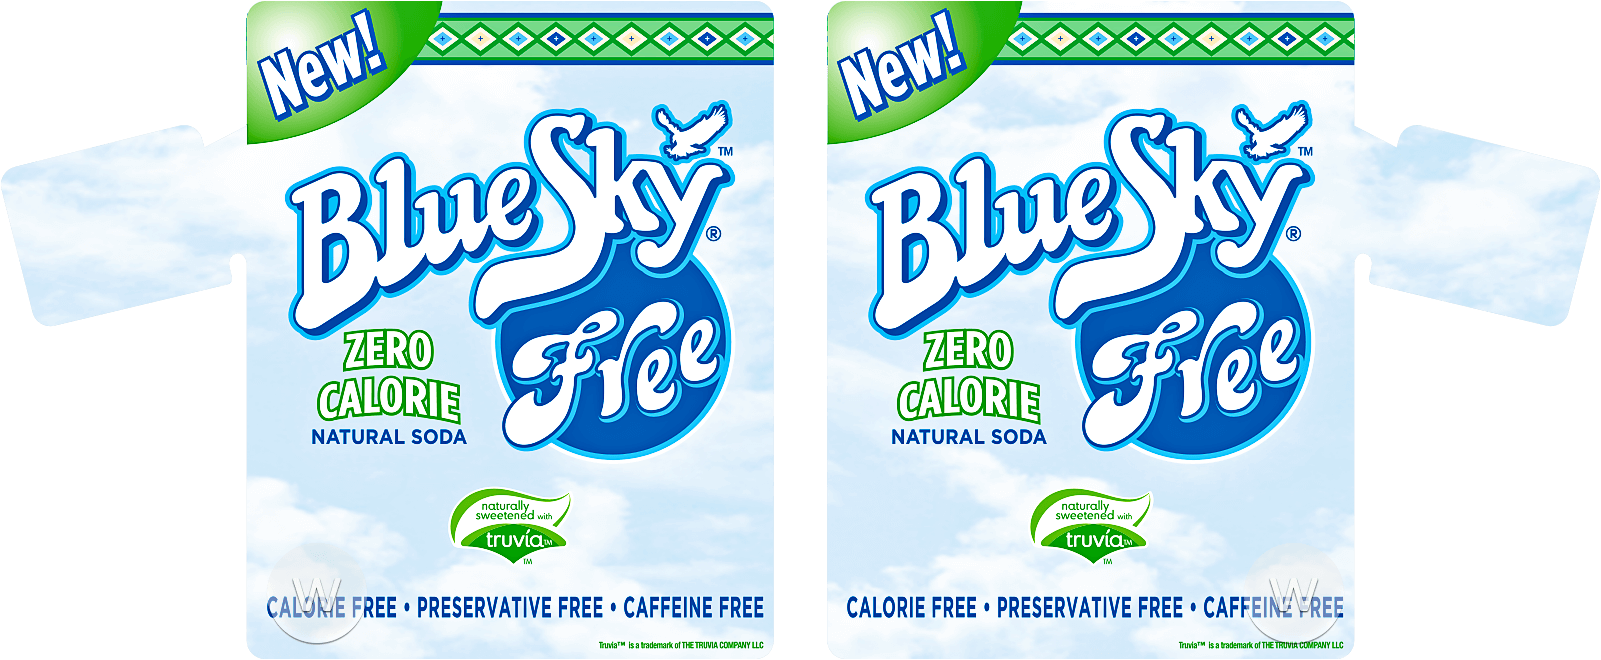
Example of Aisle Violator After Die Cutting from Template
Directions for Using Shelf Strip Templates
1. Using your die template and artwork for shelf strips is just like shelf wobblers, except for your ability to modify the template. If you need a different size; i.e., a 6.25" shelf strip, you can either modify the 6" shelf strip template in your art editing program, or contact us and we'll make a new template for you.
2. When you download a template from the shelf strip prices page, it will actually be a set of templates (2-6", or 7-12", for example). Just pick the size you need and lay it over of your artwork on its own layer. Remember to leave 1/8" past the template on all sides for the bleed (see sample below).
Shelf Strip Template

Shelf Strip Template as Layer on Top of Artwork to Show Bleed Allowance
Die Cut Shelf Strip

How to Order Shelf Talkers, Shelf Strips & Aisle Violators
1. Once you're set to go, give us a call at 714.998.5317 or email us.
2. We'll total it all up for you, including sales tax and shipping*. You can charge your Visa®, MasterCard®, American Express® or Discover® card from our online payments page. (*Shipping charges based on quantity + destination. If you'd prefer, we can use your FedEx® or UPS® account number to bill directly for shipping charges.)
3. If your file is under 20mb, you can simply attach it to your email. If it's over 20mb (or you don't want to email it), you can upload it directly to us by clicking the link below to our upload page.
Need More Help?
You can give us a call during normal business hours and we'll go through it with you. An excellent source for detailed step-by-step prepress directions can be found on Dilco's "How to Prepare Your Files for Printing"page. It includes screen shots from both Photoshop and Illustrator.